Why mix referencing is of paramount importance to your career
Mix referencing is the process of comparing your nearly finished mix to previous mixes you’ve made, other versions of your mix in the same project or commercial recordings to determine the quality of your mix. It sounds simple, but there are a few crucial things to consider to make your referencing as effective as possible. Polished mix referencing can be the difference between fans listening to your mixes and sharing them on social media channels, or opting to abstain from your mixes in future. But mix referencing is made up of several important components.
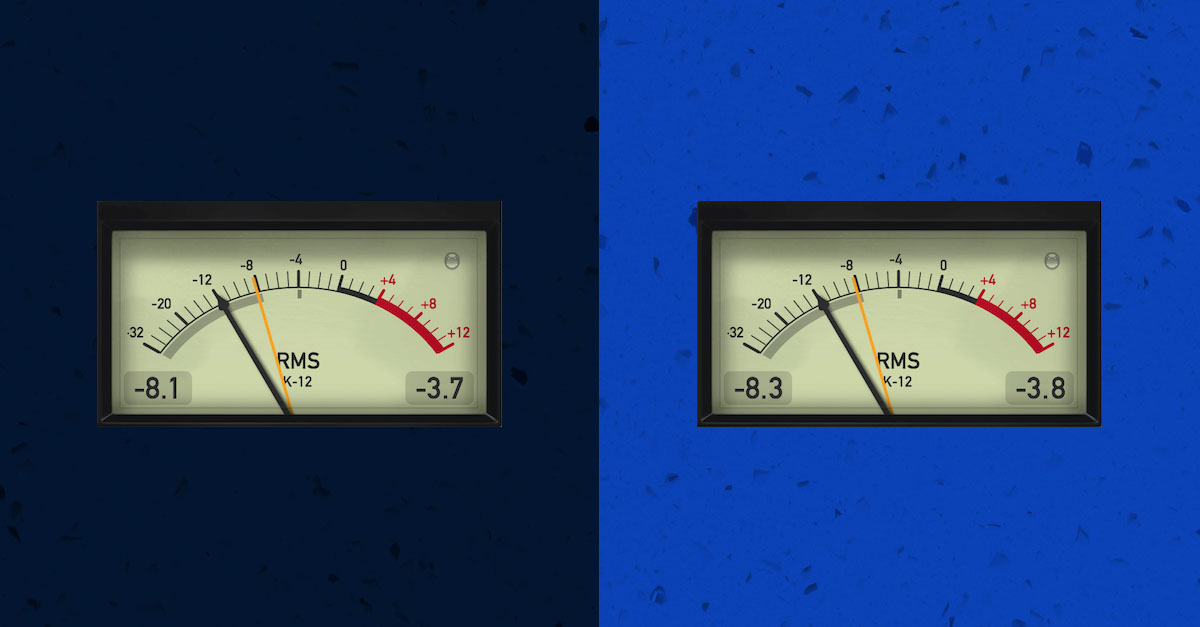
Metered matching
The cardinal rule of referencing is to match the level of the reference material to your track as closely as you can. Small differences in loudness can have a surprisingly massive effect on your perception of sound. You can only make insightful comparisons if you’re confident that the differences you’re hearing come from the mixes themselves and not from any effects or changes in the listening chain. To make sure you match the levels just right, you need to get serious about your metering. The channel meter in your DAW is fine for most metering tasks, like making sure you’re keeping ample headroom, but dedicated meter plugins offer some benefits that are particularly helpful when you’re mix referencing. Sienda FreeG is a solid free option if you’re looking to upgrade your metering.
The pre and post-mixes
The biggest difference you’ll be dealing with between your mixes and a finished professional recording is the effect of the mastering process. Use LANDR to quickly master rough tracks. The rough master will provide a more even playing field for comparison under certain circumstances. Your mastered tracks will definitely get you closer to a finished feel, but doing your references before and after mastering them with LANDR will also help. If you’re close to finishing your mix and want to compare it to a version from the same project, bounce them both and create quick masters to compare. Your mastered version will help you decide where to go with those final decisions.
What to keep an eye on
The overall frequency content of your track is the most apparent feature you should compare between your tracks. Pay specific attention to the extreme ends of the frequency spectrum. Amateur mixes are often plagued by boomy, uncontrolled lows and harsh highs that don’t extend past the upper midrange – you want to avoid this. Use your ears first, but if you have an EQ or meter plugin that can display the frequency content visually, put it on the master bus and watch how your mix stacks up against the reference material. TDR Nova is a great free plugin for visualizing the frequency content your tracks cover.
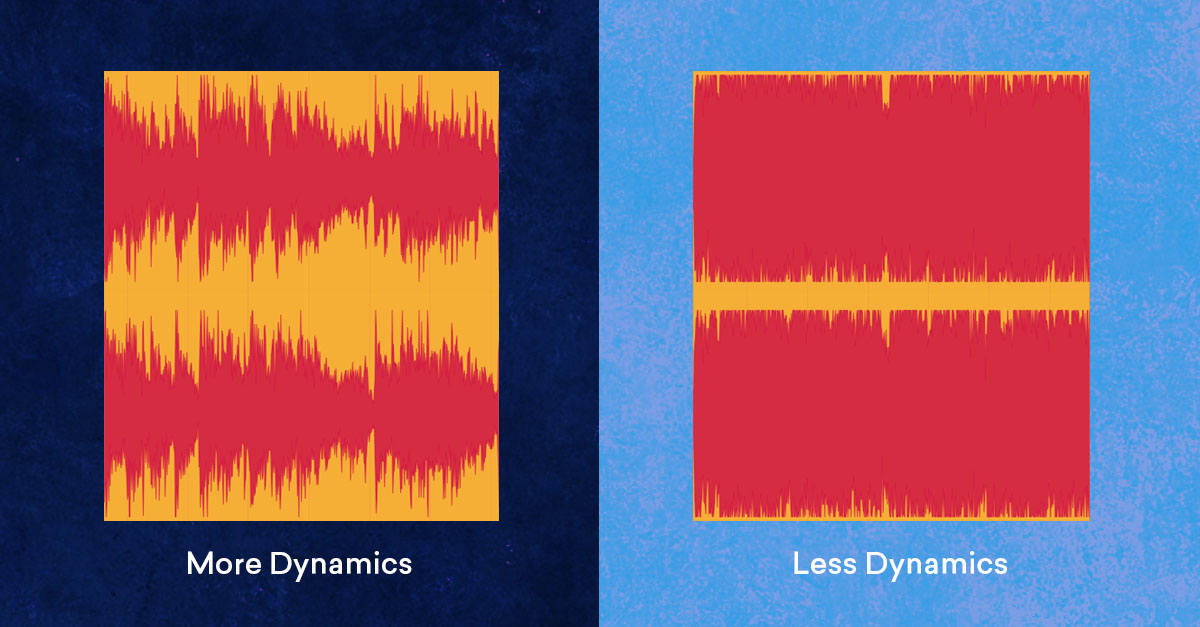
The importance of dynamics
Your track’s overall dynamics are the result of the compression you applied throughout the mix. The dynamic range of different recordings can vary wildly, so it’s important to check in with references that are appropriate for your genre and style. For instance, a naturalistic recording of a jazz combo will likely have much more dynamic range than a pop radio single intended to deliver the maximum punch to small speakers. If you find that your reference track is considerably more or less dynamic than your own, it might be a good idea to revisit the processing on your own track and ask yourself if you’re getting the sound you set out to create in the first place.
Individual elements
As you focus in, try to figure out how the individual elements should sit in your mix. Consulting reference material can give you clues about what should go where. You’ll notice that the instruments can be positioned quite differently from mix to mix as you start to analyze pro recordings. Try your best to identify the frequency ranges occupied by each instrument. You should also make a point of knowing which element of each mix is the loudest. You can do this by slowly attenuating your monitors until almost everything has become inaudible. The last audible sound before the sound that disappears altogether is the loudest overall element. Once you’ve started picking up on the factors that set mixes apart, there are some other issues to be aware of to make sure you’re referencing like a pro.
What should you reference?
With so much music out there, what reference material is going to give you the most insight on your mixes? You can pick almost anything, but commercial mixes by respected pros should make up the bulk of what you reference. Pick something stylistically consistent that parallels the way you’ve been working. It will be the most informative. You also need to use your referencing techniques to compare revisions of the same mix as you work on it. If you don’t directly compare new versions with your previous attempts, you might find yourself moving sideways instead of forwards or repeating the same mistakes twice. Your fans listen to your music in thousands of different listening environments. To help your mix translate across the board, make sure to reference on as many different systems as you can. Your LANDR mastered tracks make this step easy. Overall, there are several key things to remember when it comes to mix referencing, but by mastering the above tips, you will soon be earning the respect of your fans – and rapidly building your empire – in no time at all.
